mirror of
https://github.com/trevorsandy/ai-suite.git
synced 2026-10-01 14:05:14 +02:00

1145 lines
38 KiB
Markdown
1145 lines
38 KiB
Markdown
# AI-Suite
|
||
|
||
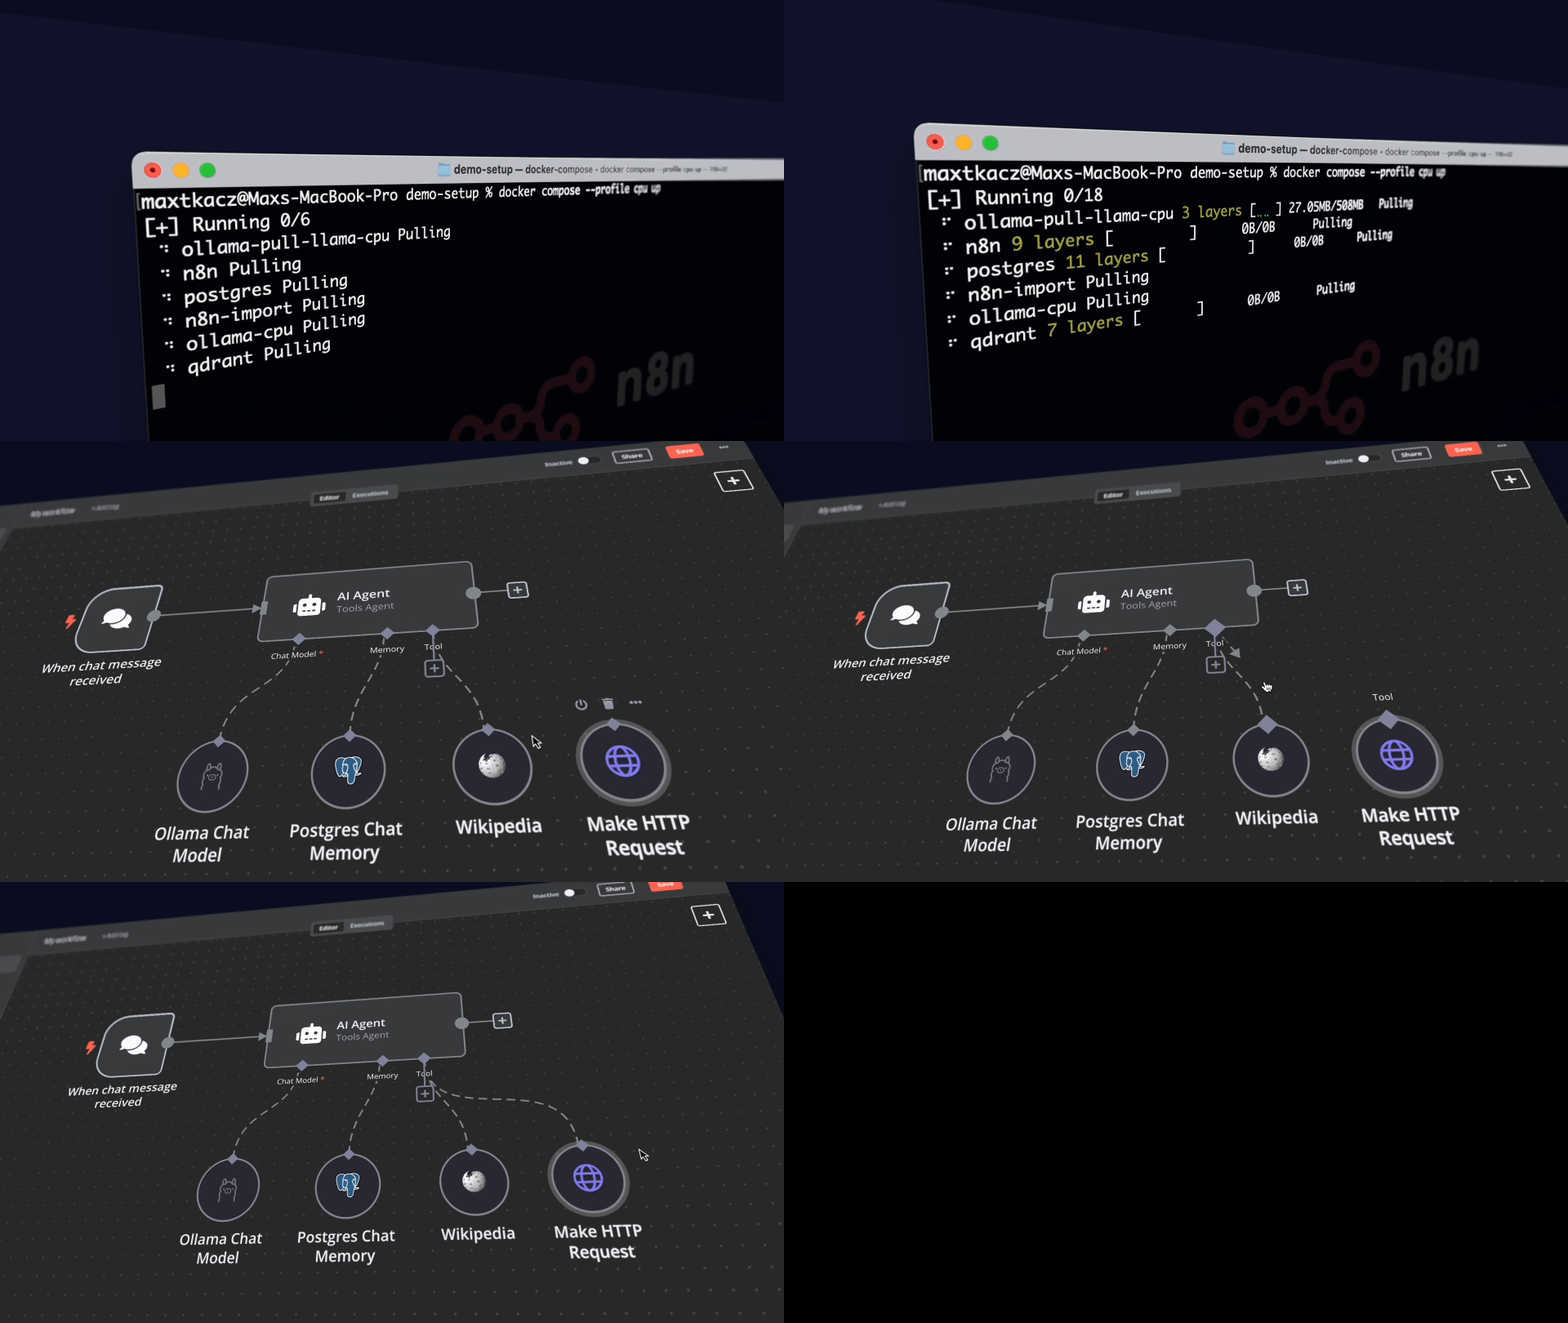
**AI-Suite** is intended to be an **end-to-end path from zero to working AI workflows**
|
||
for developers and those who want to enabe a local, private AI solution.
|
||
|
||
It provides an open, curated, pre-configured Docker Compose configuration file
|
||
that bootstraps fully featured Local AI Agents and a Low/No Code environment on
|
||
a self-hosted n8n platform, enabling users to focus on building solutions that
|
||
employ robust AI workflows.
|
||
|
||
Portions of AI-Suite extends [Cole Medin's](https://github.com/coleam00)
|
||
[Self-hosted AI Package](https://github.com/coleam00/local-ai-packaged)
|
||
which is built on the [n8n-io](https://github.com/n8n-io)
|
||
[Self-hosted AI Starter Kit](https://github.com/n8n-io/self-hosted-ai-starter-kit).
|
||
|
||
|
||
|
||
Curated by [Trevor SANDY - https://github.com/trevorsandy](https://github.com/trevorsandy).
|
||
|
||
## What’s included
|
||
|
||
✅ [**Self-hosted n8n**](https://n8n.io/) - Automation platform with over 400
|
||
integrations and advanced AI components.
|
||
|
||
✅ [**Open WebUI**](https://openwebui.com/) - ChatGPT-like interface to
|
||
privately interact with your local models and N8N agents.
|
||
|
||
✅ [**OpenCode**](https://opencode.ai/) - open source agent that helps you write
|
||
code in your terminal.
|
||
|
||
✅ [**Ollama**](https://ollama.com/) - Cross-platform LLM platform to install
|
||
and run the latest LLMs.
|
||
|
||
✅ [**Supabase**](https://supabase.com/) - Open source database as a service,
|
||
most widely used database for AI agents.
|
||
|
||
✅ [**Flowise**](https://flowiseai.com/) - No/low-code AI agent builder that
|
||
pairs very well with n8n.
|
||
|
||
✅ [**Qdrant**](https://qdrant.tech/) - Open source, high performance vector
|
||
store with an comprehensive API.
|
||
|
||
✅ [**PostgreSQL**](https://www.postgresql.org/) - Workhorse of the Data
|
||
Engineering world, backend for Langfuse.
|
||
|
||
✅ [**MCP Gateway**](https://github.com/microsoft/mcp-gateway/) - Reverse proxy
|
||
and management layer for MCP servers.
|
||
|
||
✅ [**Neo4j**](https://neo4j.com/) - Knowledge graph engine that powers tools
|
||
like GraphRAG, LightRAG, and Graphiti.
|
||
|
||
✅ [**Redis (Valkey)**](https://valkey.io/) - High-performance key/value datastore,
|
||
supports caching and message queues workloads.
|
||
|
||
✅ [**SearXNG**](https://searxng.org/) - Open source internet metasearch
|
||
engine, aggregates results from up to 229 search services.
|
||
|
||
✅ [**Langfuse**](https://langfuse.com/) - Open source LLM engineering platform
|
||
for agent observability.
|
||
|
||
✅ [**MinIO**](https://www.min.io/) - High-performance, S3-compatible object
|
||
storage solution.
|
||
|
||
✅ [**ClickHouse**](https://clickhouse.com/) - Open source, database management
|
||
system that can generate analytical data reports in real-time.
|
||
|
||
✅ [**Caddy**](https://caddyserver.com/) - Managed HTTPS/TLS for custom domains.
|
||
|
||
## Prerequisites
|
||
|
||
Before you begin, make sure you have the following software installed:
|
||
|
||
- [Python](https://www.python.org/downloads/) - To run the setup script.
|
||
|
||
<details>
|
||
<summary>Import modules</summary>
|
||
|
||
```bash
|
||
os
|
||
sys
|
||
datetime
|
||
subprocess
|
||
pathlib
|
||
shutil
|
||
time
|
||
argparse
|
||
platform
|
||
dotenv
|
||
tempfile
|
||
textwrap
|
||
re
|
||
```
|
||
|
||
</details>
|
||
|
||
- [Git/GitHub Desktop](https://desktop.github.com/) - For easy repository management.
|
||
- [Docker/Docker Desktop](https://www.docker.com/products/docker-desktop/) - Required
|
||
to setup and run all AI-Suite services.
|
||
|
||
<details>
|
||
<summary>Docker Compose commands</summary>
|
||
|
||
If you are using a machine without the `docker compose` application available
|
||
by default, run these commands to install Docker compose:
|
||
|
||
```bash
|
||
DOCKER_COMPOSE_VERSION=$(curl -s https://api.github.com/repos/docker/compose/
|
||
releases/latest | grep 'tag_name' | cut -d\\" -f4)
|
||
sudo curl -L "https://github.com/docker/compose/releases/download/${DOCKER_COMPOSE_VERSION}/docker-compose-linux-x86_64" -o /usr/local/bin docker-compose
|
||
sudo chmod +x /usr/local/bin/docker-compose
|
||
sudo mkdir -p /usr/local/lib/docker/cli-plugins
|
||
sudo ln -s /usr/local/bin/docker-compose /usr/local/lib/docker/cli-plugins/docker-compose
|
||
```
|
||
|
||
</details>
|
||
|
||
## Installation
|
||
|
||
1. Clone the repository and navigate to the project directory:
|
||
|
||
```powershell
|
||
git clone https://github.com/trevorsandy/ai-suite.git
|
||
cd ai-suite
|
||
```
|
||
|
||
2. Make a copy of `.env.example` renamed to `.env` in the project directory.
|
||
|
||
```powershell
|
||
cp .env.example .env # update secrets and passwords inside
|
||
```
|
||
|
||
3. Set the following required environment variables:
|
||
|
||
<details>
|
||
<summary>Credential environment variables</summary>
|
||
|
||
```ini
|
||
############
|
||
# Generating Credentials
|
||
# OpenSSL: Available by default on Linux/Mac via command `openssl rand -hex 32`
|
||
# For Windows, use 'WSL2', 'Git Bash' terminal installed with git or from cmd
|
||
# run the command: python -c "import secrets; print(secrets.token_hex(32))"
|
||
#
|
||
# Password: Use Python command to generate 16-character strong password:
|
||
# python3 -c "import secrets;import string; alphabet = string.ascii_letters + string. digits;\
|
||
# password = ''.join(secrets.choice(alphabet) for i in range(16));\
|
||
# print(password)"
|
||
#
|
||
# JWT Tokens: Use https://jwtsecrets.com/#generator to generate keys and tokens
|
||
# ranging from 8 to 128 characters long.
|
||
############
|
||
|
||
############
|
||
# [required]
|
||
# n8n credentials - use OpenSSL for both
|
||
############
|
||
|
||
# Master key used to encrypt sensitive credentials that n8n stores
|
||
N8N_ENCRYPTION_KEY=change_me_to_a_long_super-secret-key
|
||
# Shared secret between n8n containers and runners sidecars
|
||
N8N_RUNNERS_AUTH_TOKEN=change_me_to_a_long_super-secret-key
|
||
# Specific JWT secret. By default, n8n generates one on start
|
||
N8N_USER_MANAGEMENT_JWT_SECRET=change_me_to_a_longer_even-more-secret
|
||
|
||
############
|
||
# [required]
|
||
# Supabase Secrets
|
||
############
|
||
|
||
JWT_SECRET=your-super-secret-jwt-token-at-least-40-characters-long
|
||
ANON_KEY=your-super-secret-jwt-key-see-https://supabase.com/docs/guides/self-hosting/docker#generate-api-keys
|
||
SERVICE_ROLE_KEY=your-super-secret-jwt-key-see-https://supabase.com/docs/guides/self-hosting/docker#generate-api-keys
|
||
DASHBOARD_USERNAME=supabase
|
||
DASHBOARD_PASSWORD=your-super-secret-password
|
||
POOLER_TENANT_ID=your-tenant-id
|
||
|
||
############
|
||
# [required]
|
||
# PostgreSQL database user password
|
||
############
|
||
|
||
POSTGRES_PASSWORD=your-super-secret-postgres-password
|
||
|
||
############
|
||
# [required]
|
||
# Flowise - authentication configuration
|
||
############
|
||
|
||
FLOWISE_PASSWORD=your-super-secret-flowise-password
|
||
|
||
############
|
||
# [required]
|
||
# Neo4j - username and password combination
|
||
############
|
||
|
||
NEO4J_AUTH=neo4j-user/your-super-secret-password
|
||
|
||
############
|
||
# [required]
|
||
# Langfuse credentials
|
||
############
|
||
|
||
CLICKHOUSE_PASSWORD=your-super-secret-password-1
|
||
MINIO_ROOT_PASSWORD=your-super-secret-password-2
|
||
LANGFUSE_SALT=your-super-secret-key-1 # use OpenSSL
|
||
NEXTAUTH_SECRET=your-super-secret-key-2 # use OpenSSL
|
||
ENCRYPTION_KEY=your-super-secret-key-3 # use OpenSSL
|
||
|
||
############
|
||
# [required for production]
|
||
# Caddy Config
|
||
############
|
||
|
||
# N8N_HOSTNAME=n8n.yourdomain.com
|
||
# WEBUI_HOSTNAME=openwebui.yourdomain.com
|
||
# FLOWISE_HOSTNAME=flowise.yourdomain.com
|
||
# SUPABASE_HOSTNAME=supabase.yourdomain.com
|
||
# LANGFUSE_HOSTNAME=langfuse.yourdomain.com
|
||
# OLLAMA_HOSTNAME=ollama.yourdomain.com
|
||
# LLAMACPP_HOSTNAME=llama.cpp.yourdomain.com
|
||
# SEARXNG_HOSTNAME=searxng.yourdomain.com
|
||
# NEO4J_HOSTNAME=neo4j.yourdomain.com
|
||
# LETSENCRYPT_EMAIL=internal
|
||
|
||
...
|
||
|
||
############
|
||
# Logs - Configuration for Analytics
|
||
# Please refer to https://supabase.com/docs/reference/self-hosting-analytics/introduction
|
||
############
|
||
|
||
# Change vector.toml sinks to reflect this change
|
||
# these cannot be the same value
|
||
LOGFLARE_PUBLIC_ACCESS_TOKEN=your-super-secret-and-long-logflare-key-public
|
||
LOGFLARE_PRIVATE_ACCESS_TOKEN=your-super-secret-and-long-logflare-key-private
|
||
|
||
...
|
||
```
|
||
|
||
</details>
|
||
|
||
> [!IMPORTANT]
|
||
> Make sure to generate secure random values for all secrets. Never use the
|
||
> example values in production.
|
||
|
||
---
|
||
|
||
**AI-Suite** uses the `suite_services.py` script for the _installation_ command
|
||
that handles the AI-Suite functional module selection, llama CPU/GPU configuration,
|
||
and starting Supabase and Open WebUI Filesystem when specified.
|
||
|
||
This script is also used for operation commands that _start_, _stop_, _stop-llama_,
|
||
_pause_, _unpause_, _update_ and _install_ the AI-Suite services using the optional
|
||
`--operation` argument. A llama (Ollama/Llama.cpp) check is performed when it is
|
||
assumed llama is running from the Docker Host. If llama is determined to be installed
|
||
but not running, an attempt to launch the Ollama/Llama.cpp service is executed
|
||
on _install_, _start_ and _unpause_. The check will also attempt to _stop_ the
|
||
running llama service (in addition to stopping the AI-Suite services) when the
|
||
_stop-llama_ operational command is specified.
|
||
|
||
Both installation and operation commands utilize the optional `--profile`
|
||
arguments to specify which AI-Suite functional modules and which llama CPU/GPU
|
||
configuration to use. When no functional profile argument is specified, the
|
||
default functional module `open-webui` is used, Likewise, if no CPU/GPU configuration
|
||
profile is specified, it is assumed llama is being run from the Docker Host.
|
||
**Multiple profile arguments (functional modules) are supported**.
|
||
|
||
The `--environment` command allows the installation to be defined as _private_
|
||
(default) or _public_. A public install restricts the communication ports exposed
|
||
to the network.
|
||
|
||
---
|
||
`suite_services.py` `--profile` functional module arguments
|
||
|
||
| Argument | Functional Module |
|
||
| -----------------------: | ------: |
|
||
| `n8n` | n8n - automation platform |
|
||
| `opencode` | OpenCode - low-code, no-code agent |
|
||
| `open-webui` | Open WebUI - chatbot interface |
|
||
| `open-webui-mcpo` | Open WebUI MCPO - MCP to OpenAPI translator |
|
||
| `open-webui-pipe` | Open WebUI Pipelines - agent tools and functions |
|
||
| `flowise` | Flowise - complementary agent builder |
|
||
| `supabase` | Supabase - alternative database |
|
||
| `searxng` | SearXNG - internet metasearch |
|
||
| `langfuse` | Langfuse - agent observability platform |
|
||
| `neo4j` | Neo4j - knowledge graph |
|
||
| `caddy` | Caddy - managed https/tls server |
|
||
| `n8n-all` | n8n - complete bundle |
|
||
| `open-webui-all` | Open WebUI - complete bundle |
|
||
| `ai-all` | AI-Suite full stack - all modules |
|
||
|
||
`suite_services.py` `--profile` llama CPU/GPU argument:
|
||
|
||
| Argument | Llama CPU/GPU |
|
||
| -----------------------: | ------: |
|
||
| `cpu` | Ollama - run on CPU |
|
||
| `gpu-nvidia` | Ollama - run on Nvidia GPU |
|
||
| `gpu-amd` | Ollama - run on AMD GPU |
|
||
| `cpp-cpu` | Llama.cpp - run on CPU |
|
||
| `cpp-gpu-nvidia` | Llama.cpp - run on Nvidia GPU |
|
||
| `cpp-gpu-amd` | Llama.cpp - run on AMD GPU |
|
||
|
||
Example command:
|
||
|
||
```powershell
|
||
python suite_services.py --profile n8n opencode gpu-nvidia
|
||
```
|
||
|
||
---
|
||
|
||
`suite_services.py` ... `--operation` argument:
|
||
|
||
| Argument | Operation |
|
||
| -----------------------: | ------: |
|
||
| `start` | Start - start the previously stopped, specified profile containers |
|
||
| `stop` | Stop - shut down the specified profile containers |
|
||
| `stop-llama` | Stop - perform `stop` and shut down Ollama/Llama.cpp on Host |
|
||
| `pause` | Pause - pause the specified profile containers |
|
||
| `unpause` | Unpause - unpause the previously paused profile containers |
|
||
|
||
Example command:
|
||
|
||
```powershell
|
||
python suite_services.py --profile n8n opencode gpu-nvidia --operation stop
|
||
```
|
||
|
||
---
|
||
|
||
If you intend to install Supabase, before running `suite_services.py`, setup the
|
||
Supabase environment variables using their [self-hosting guide](https://supabase.com/docs/guides/self-hosting/docker#securing-your-services).
|
||
|
||
### For Docker OLLAMA with Nvidia GPU users
|
||
|
||
```powershell
|
||
python suite_services.py --profile gpu-nvidia
|
||
```
|
||
|
||
> [!NOTE]
|
||
> If you have not used your Nvidia GPU with Docker before, please follow the
|
||
> [Ollama Docker instructions](https://github.com/ollama/ollama/blob/main/docs/docker.mdx).
|
||
|
||
### For Docker OLLAMA with AMD GPU users on Linux
|
||
|
||
```powershell
|
||
python suite_services.py --profile gpu-amd
|
||
```
|
||
|
||
### For OLLAMA on Mac /Apple Silicon or OLLAMA running in the Host
|
||
|
||
If you're using a Mac with an M1 or newer processor, you can't expose your GPU
|
||
to the Docker instance, unfortunately. There are two options in this case:
|
||
|
||
1. Run ai-suite fully on CPU:
|
||
|
||
```powershell
|
||
python suite_services.py --profile cpu
|
||
```
|
||
|
||
2. Run Ollama on your Host for faster inference, and connect to that from the
|
||
n8n instance:
|
||
|
||
```powershell
|
||
python suite_services.py --profile n8n
|
||
```
|
||
|
||
If you want to run Ollama on your Mac, check the [Ollama homepage](https://ollama.com/)
|
||
for installation instructions.
|
||
|
||
#### For users running OLLAMA on the Host
|
||
|
||
If you're running OLLAMA in your Docker Host (not in Docker), modify the
|
||
OLLAMA_HOST environment variable in the n8n service configuration and update the
|
||
x-n8n section in your .env file:
|
||
|
||
```ini
|
||
OLLAMA_HOST=host.docker.internal:11434
|
||
#OLLAMA_HOST=ollama:11434
|
||
|
||
# ... other configurations ...
|
||
|
||
# When running OLLAMA in the Host and Open WebUI in Docker:
|
||
OLLAMA_BASE_URL=http://host.docker.internal:11434
|
||
#OLLAMA_BASE_URL=http://localhost:11434
|
||
```
|
||
|
||
... or youe Docker Compose file:
|
||
|
||
```yaml
|
||
x-n8n: &service-n8n
|
||
# ... other configurations ...
|
||
environment:
|
||
# ... other environment variables ...
|
||
- OLLAMA_HOST=host.docker.internal:11434
|
||
```
|
||
|
||
### For everyone else
|
||
|
||
```powershell
|
||
python suite_services.py --profile cpu
|
||
```
|
||
|
||
### The environment argument
|
||
|
||
The `suite_services.py` script supports a **private** (default) and **public**
|
||
environment argument:
|
||
|
||
- **private:** you are deploying the stack in a safe environment, all AI-Suite
|
||
ports are accessible
|
||
- **public:** the stack is deployed in a public environment, all AI-Suite ports
|
||
except _80_ and _443_ are closed
|
||
|
||
`suite_services.py` ... `--environment` arguments:
|
||
|
||
| Argument | Scope |
|
||
| -----------------------: | ------: |
|
||
| `private` | Private network |
|
||
| `public` | Public network |
|
||
|
||
The AI-Suite stack initialized with...
|
||
|
||
```powershell
|
||
python suite_services.py --profile gpu-nvidia --environment private
|
||
```
|
||
|
||
is equal to being initialized with:
|
||
|
||
```powershell
|
||
python suite_services.py --profile gpu-nvidia
|
||
```
|
||
|
||
## Deploying to the Cloud
|
||
|
||
### Prerequisites for the below steps
|
||
|
||
- Linux machine (preferably Unbuntu) with Nano, Git, and Docker installed
|
||
|
||
### Extra steps
|
||
|
||
Before running the above commands to pull the repo and install everything:
|
||
|
||
> [!WARNING]
|
||
> ufw does not shield ports published by Docker, because the iptables rules
|
||
> configured by Docker are analyzed before those configured by ufw. There is a
|
||
> solution to change this behavior, but that is out of scope for this project.
|
||
> Just make sure that all traffic runs through the Caddy service via port _443_.
|
||
> Port _80_ should only be used to redirect to port _443_.
|
||
|
||
1. Run the commands as root to open up the necessary ports:
|
||
|
||
```bash
|
||
ufw enable
|
||
ufw allow 80 && ufw allow 443
|
||
ufw reload
|
||
```
|
||
|
||
2. Run the `suite_services.py` script with the environment argument **public**
|
||
to indicate you are going to run the package in a public environment. The
|
||
script will make sure that all ports, except for _80_ and _443_, are closed
|
||
down, e.g.
|
||
|
||
```bash
|
||
python3 suite_services.py --profile gpu-nvidia --environment public
|
||
```
|
||
|
||
3. Set up A records for your DNS provider to point your subdomains you'll set
|
||
up in the .env file for Caddy to the IP address of your cloud instance.
|
||
|
||
For example, A record to point n8n to [cloud instance IP] for n8n.yourdomain.com
|
||
|
||
> [!NOTE]
|
||
> If you are using a cloud machine without the "docker compose" command
|
||
> available by default such as a Ubuntu GPU instance on DigitalOcean, run these
|
||
> commands before running suite_services.py:
|
||
|
||
<details>
|
||
<summary>Docker Compose setup commands</summary>
|
||
|
||
```bash
|
||
DOCKER_COMPOSE_VERSION=$(curl -s https://api.github.com/repos/docker/compose/releases/latest | grep 'tag_name' | cut -d\\" -f4)
|
||
sudo curl -L "https://github.com/docker/compose/releases/download/${DOCKER_COMPOSE_VERSION}/docker-compose-linux-x86_64" -o /usr/local/bin/docker-compose
|
||
sudo chmod +x /usr/local/bin/docker-compose
|
||
sudo mkdir -p /usr/local/lib/docker/cli-plugins
|
||
sudo ln -s /usr/local/bin/docker-compose /usr/local/lib/docker/cli-plugins/docker-compose
|
||
```
|
||
|
||
</details>
|
||
|
||
## ⚡️ Quick start and usage
|
||
|
||
All components of the self-hosted AI-Suite, except if running Ollama from your
|
||
host, is installed through `suite_services.py` and managed through a Docker Compose
|
||
file pre-configured with network and disk so there isn’t much else you need to
|
||
install. After completing the installation steps above, follow the steps below
|
||
to get started. First, start with **n8n**.
|
||
|
||
Use the following settings to confirm or upate n8n Credentials.
|
||
|
||
- Local Ollama service: base URL <http://ollama:11434/> (n8n config), <http://localhost:11434/>
|
||
(browser)
|
||
|
||
- Local QdrantApi database: base URL <http://qdrant:6333/> (n8n config), <http://localhost:6333/>
|
||
(browser)
|
||
|
||
- Postgres account: use _POSTGRES_HOST_, _POSTGRES_USER_, and _POSTGRES_PASSWORD_
|
||
from your .env file.
|
||
|
||
- Google Drive: This credential is optional. Follow [this guide from n8n](https://docs.n8n.io/integrations/builtin/credentials/google/).
|
||
|
||
> [!IMPORTANT]
|
||
> For Supabase, _POSTGRES_HOST_ is 'db' since that is the name of the
|
||
> service running Supabase.
|
||
<!-- -->
|
||
> [!NOTE]
|
||
> If you are running OLLAMA on your Host, for the credential _Local Ollama
|
||
> service_, set the base URL to <http://host.docker.internal:11434/> and set
|
||
> _Local QdrantApi database_ to <http://host.docker.internal:6333/>.
|
||
>
|
||
> Don't use _localhost_ for the redirect URI, instead, use another domain.
|
||
> It will still work!
|
||
> Alternatively, you can set up [local file triggers](https://docs.n8n.io/integrations/builtin/core-nodes/n8n-nodes-base.localfiletrigger/).
|
||
|
||
1. Open <http://localhost:5678/> in your browser to initialize and set up n8n.
|
||
You’ll only have to set your admin login credentials once. You are NOT creating
|
||
an account with n8n in the setup here, it is only a local account for your
|
||
instance!
|
||
|
||
- Go to <http://localhost:5678/home/credentials> to configure credentials.
|
||
- Click on **Local QdrantApi database** and set the base URL as specified above.
|
||
- Click on **Local Ollama service** and set the base URL as specified above.
|
||
- Click on **Create credential**, enter _Postgres_ in the search field and
|
||
follow the subsequent dialogs to setup the _Postgres account_ as specified
|
||
above.
|
||
|
||
2. Open the [Demo workflow](http://localhost:5678/workflow/srOnR8PAY3u4RSwb) and
|
||
confirm the credentials for _Local Ollama service_ is properly configured.
|
||
|
||
3. Select **Test workflow** to confirm the workflow is properly configured.
|
||
If this is the first time you’re running the workflow, you may need to wait
|
||
until Ollama finishes downloading the specified model. You can inspect the
|
||
docker console logs to check on the progress.
|
||
|
||
4. Toggle the _Demo workflow_ as active and treat the _RAG AI Agent_ workflows.
|
||
|
||
<details>
|
||
<summary>Configure additional n8n workflows as desired:</summary>
|
||
|
||
[V1 Local RAG AI Agent](<http://localhost:5678/workflow/vTN9y2dLXqTiDfPT>)
|
||
|
||
[V2 Qdrant RAG AI Agent](<http://localhost:5678/workflow/hrnPh6dXgIbGVzIk>)
|
||
|
||
[V3 Local Agentic RAG AI Agent](<http://localhost:5678/workflow/RssROpqkXOm23GYL>)
|
||
|
||
[V4 Local_Get_Postgres_Tables](<http://localhost:5678/workflow/t15NIcuhUMXOE8DM>)
|
||
|
||
</details>
|
||
|
||
5. Next, configure **Open WebUI**. Open <http://localhost:8080/> in your browser
|
||
to initialize and set up Open WebUI. You’ll only have to set your admin login
|
||
credentials once. You are NOT creating an account with Open WebUI in the setup
|
||
here, it is only a local account for your instance!
|
||
|
||
6. Go to **Workspace → Functions** to setup the n8n Pipes (Pipeline) function.
|
||
This function will enable integration with n8n as an entry in your model dropdown
|
||
list.
|
||
|
||
- Click on **New Function**
|
||
- Enter _n8n Pipeline_ at **Function Name** and **Function ID** will auto-populate
|
||
with _n8n_Pipeline_
|
||
- Enter _An optimized streaming-enabled pipeline for interacting with n8n workflows_
|
||
in **Description**
|
||
- Copy the _n8n_Pipeline function_ code at [n8n.py](https://github.com/owndev/Open-WebUI-Functions/blob/main/pipelines/n8n/n8n.py)
|
||
(or the downloaded instance at `./open-webui/functions/owndev/pipelines/n8n/n8n.py`)
|
||
and paste it into the edit dialog.
|
||
|
||
7. Copy the webhook URL from the _n8n_Pipeline_ function set in step 6.
|
||
|
||
8. Click on the gear icon and set the n8n_url to the webhook URL you copied
|
||
in a previous step.
|
||
|
||
9. Toggle the function on and now it will be available in your model dropdown
|
||
in the top left.
|
||
|
||
To open **n8n**, visit <http://localhost:5678/> from your browser.
|
||
|
||
To open **Open WebUI**, visit <http://localhost:3000/> from your browser.
|
||
|
||
To open **OpenCode** run `./opencode/run_opencode_docker.py` from a new terminal.
|
||
|
||
## Additional Configuration
|
||
|
||
With n8n, you have access to over 400 integrations and a suite of basic and
|
||
advanced AI nodes such as:
|
||
[AI Agent](https://docs.n8n.io/integrations/builtin/cluster-nodes/root-nodes/n8n-nodes-langchain.agent/),
|
||
[Text classifier](https://docs.n8n.io/integrations/builtin/cluster-nodes/root-nodes/n8n-nodes-langchain.text-classifier/),
|
||
and [Information Extractor](https://docs.n8n.io/integrations/builtin/cluster-nodes/root-nodes/n8n-nodes-langchain.information-extractor/)
|
||
nodes.
|
||
|
||
To keep everything local, use the Ollama node for your language model and Qdrant
|
||
as your vector store.
|
||
|
||
> [!NOTE]
|
||
> AI-Suite is designed to help you get started with self-hosted AI
|
||
> workflows. While it is not fully optimized for production environments, it
|
||
> combines robust components that work well together for personal porjects.
|
||
> Of course, you can further customize it to meet your specific needs.
|
||
|
||
### PROJECTS_PATH environment variable
|
||
|
||
You can use the `PROJECTS_PATH` environment variable to allow **n8n**,
|
||
**OpenCode**, and **Open WebUI Filesystem** access to your project files.
|
||
During the installation process, if the key is not already present (or has no
|
||
value) in your `.env` file, the key and value are written to the working
|
||
environment variables with the value set to `~/projects`. You can override this
|
||
behaviour by manually setting your desired path for this key in the .env file.
|
||
|
||
`PROJECTS_PATH` forms a volume _bind mount_ to container paths for the functional
|
||
modules described above:
|
||
|
||
| Module | Container | Bind Mount |
|
||
| ---------: | -----------: | ------: |
|
||
| n8n | n8n | `/home/node/projects` |
|
||
| OpenCode | opencode | `/root/projects` |
|
||
| Open WebUI Tool Filesystem | open-webui-filesystem | `/nonexistent/tmp` |
|
||
|
||
### n8n
|
||
|
||
- **MCP Client**
|
||
- Configure MCP Client credentials.
|
||
|
||
- In **Nodes panel**, search for `MCP`.
|
||
- Select `MCP Client`.
|
||
- Set _MCP Endpoint URL_: `http://host.docker.internal:8060`.
|
||
|
||
- **MCP Client (node)**
|
||
|
||
- Install community nodes - You may need to restart container.
|
||
|
||
- Go to **Settings → Community nodes**
|
||
- Use npm _Package Name_: _n8n-nodes-mcp_.
|
||
- Install node.
|
||
|
||
- Configure MCP Client (node) credentials.
|
||
|
||
- In **Nodes panel**, search for `MCP`.
|
||
- Select `MCP Client (node)`.
|
||
- In the node settings, select _Connection Type_: `HTTP Streamable`.
|
||
- Create new credentials of type _MCP Client (HTTP Streamable) API_.
|
||
- Set _HTTP Streamable URL_: `http://host.docker.internal:3001/stream`.
|
||
- Add any required headers for authentication.
|
||
|
||
### Open WebUI
|
||
|
||
- **MCPO**
|
||
|
||
- Your MCP tool is available at <http://host.docker.internal:8090>.
|
||
- Test it live at <http://host.docker.internal:8090/docs>.
|
||
- Using the config file [./open-webui/mcpo/config.json](./open-webui/mcpo/config.json),
|
||
set additional configuration settings as desired.
|
||
- As we are using the config file _config.json_, each tool will be accessible
|
||
under its own unique route, e.g. <http://host.docker.internal:8090/MCP_DOCKER>.
|
||
|
||
- **Locally available functions**
|
||
|
||
Pipes:
|
||
|
||
- <details>
|
||
<summary>n8n</summary>
|
||
|
||
```sh
|
||
./open-webui/functions/owndev/pipelines/n8n/
|
||
```
|
||
|
||
</details>
|
||
|
||
- <details>
|
||
<summary>Anthropic</summary>
|
||
|
||
```sh
|
||
./open-webui/functions/open-webui/functions/pipes/anthropic/
|
||
```
|
||
|
||
</details>
|
||
|
||
- <details>
|
||
<summary>Open AI</summary>
|
||
|
||
```sh
|
||
./open-webui/functions/open-webui/functions/pipes/openai/
|
||
```
|
||
|
||
</details>
|
||
|
||
Filters:
|
||
|
||
- <details>
|
||
<summary>Various filters</summary>
|
||
|
||
```sh
|
||
./open-webui/functions/owndev/filters/
|
||
```
|
||
|
||
</details>
|
||
|
||
- <details>
|
||
<summary>Agent hotswap</summary>
|
||
|
||
```sh
|
||
./open-webui/functions/open-webui/functions/filters/agent_hotswap/
|
||
```
|
||
|
||
</details>
|
||
|
||
- <details>
|
||
<summary>Context clip</summary>
|
||
|
||
```sh
|
||
./open-webui/functions/open-webui/functions/filters/context_clip/
|
||
```
|
||
|
||
</details>
|
||
|
||
- <details>
|
||
<summary>Dynamic vision router</summary>
|
||
|
||
```sh
|
||
./open-webui/functions/open-webui/functions/filters/dynamic_vision_router/
|
||
```
|
||
|
||
</details>
|
||
|
||
- <details>
|
||
<summary>Max turns</summary>
|
||
|
||
```sh
|
||
./open-webui/functions/open-webui/functions/filters/max_turns/
|
||
```
|
||
|
||
</details>
|
||
|
||
- <details>
|
||
<summary>Moderation</summary>
|
||
|
||
```sh
|
||
./open-webui/functions/open-webui/functions/filters/moderation/
|
||
```
|
||
|
||
</details>
|
||
|
||
- <details>
|
||
<summary>Summarizer</summary>
|
||
|
||
```sh
|
||
./open-webui/functions/open-webui/functions/filters/summarizer/
|
||
```
|
||
|
||
</details>
|
||
|
||
- Manual Configuration.
|
||
|
||
- Navigate to the _locally available functions_ folder containing your desired
|
||
function `.py` file.
|
||
- Copy the complete code from the function file (e.g. main.py)
|
||
- Add as a new Function in **OpenWebUI → Admin Panel → Functions**
|
||
- Configure function-specific settings as needed - follow function README for
|
||
details.
|
||
- Enable the Function (also be sure to enable to Agent Swapper Icon in chat)
|
||
|
||
- **Filesystem** (Server Tool)
|
||
|
||
- Your Filesystem server is available at <http://host.docker.internal:8091/docs>.
|
||
|
||
- **Pipelines**
|
||
|
||
- Connect to Open WebUI.
|
||
|
||
- Navigate to the **Settings → Connections → OpenAI API** section in Open WebUI.
|
||
- Set the _API URL_ to `http:\\host.docker.internal:9099` and the _API key_
|
||
to `0p3n-w3bu!`. Your pipelines should now be active.
|
||
|
||
- Manage Configurations.
|
||
|
||
- In the _admin panel_, go to **Admin Settings → Pipelines tab**.
|
||
- Select your desired pipeline and modify the valve values directly from WebUI.
|
||
|
||
### Open Code
|
||
|
||
- **run_opencode_docker.py**
|
||
|
||
- Copy `./opencode/run_opencode_docker.py` to or run it from your current work
|
||
project.
|
||
|
||
- **opencode.jsonc**
|
||
|
||
- Using the config file at [./opencode/opencode.jsonc](./opencode/opencode.jsonc)
|
||
- Set additional configuration settings as desired.
|
||
|
||
- **PROJECT_PATH environment variable**
|
||
|
||
- Set the `PROJECT_PATH` env variable to your working project directory before
|
||
running OpenCode if you wish to set the work path to your current project but
|
||
you will _NOT_ launch OpenCode from the root of your working project.
|
||
If the `PROJECT_PATH` var is not defined, the currend working directory from
|
||
which OpenCode was launched is assumed.
|
||
|
||
- **project_path argument**
|
||
|
||
- You can also pass a _project_path_ argument to `./opencode/run_opencode_docker.py`
|
||
with `-p`, `--project_path` so an example command would be:
|
||
|
||
```powershell
|
||
python run_opencode_docker.py --project_path 'opencode'
|
||
```
|
||
|
||
> [!NOTE]
|
||
> It is recommended that your working project directory be within and relative to
|
||
> the path set for `PROJECTS_PATH` in the AI-Suite .env file - see
|
||
> **PROJECTS_PATH environment variable** section described above.
|
||
>
|
||
> **Important**: The format of the `PROJECT_PATH` entry must be the portion of
|
||
> your project path that is relative to the entry specified in `PROJECTS_PATH`.
|
||
> For example, if the _full path_ to your project is `~/projects/ai-suite/opencode`
|
||
> , your `PROJECT_PATH` entry must be `ai-suite/opencode`, if your `PROJECTS_PATH`
|
||
> entry is `~/projects`.
|
||
>
|
||
> When set, `PROJECT_PATH` is appended to the OpenCode container bind mounted
|
||
> path `/root/projects` and the resulting path is set as _work_dir_ to form the
|
||
> OpenCode Docker exec command's _workdir=work_dir_ keyword argument.
|
||
|
||
### Ollama or Llama.cpp - running on host
|
||
|
||
- **LLAMA_PATH environment variable**
|
||
|
||
- If _Ollama_ is installed in a custom location or you are using _Llama.cpp_,
|
||
Add `LLAMA_PATH` with its absolute path (including the file name) to your
|
||
_.env_ file.
|
||
|
||
- **OLLAMA_SERVER_ARGS environment variable**
|
||
|
||
- Add _OLLAMA_SERVER_ARGS_ with additional Ollama server process start arguments
|
||
to your _.env_ file.
|
||
|
||
- **LLAMACPP_MODELS_DIR environment variable**
|
||
|
||
- If you are using _Llama.cpp_ with models that were **not** downloaded with
|
||
that instance of _Llama.cpp_, add `LLAMACPP_MODELS_DIR` with said models path
|
||
to your _.env_ file.
|
||
|
||
- **LLAMACPP_SERVER_ARGS environment variable**
|
||
- Add _LLAMACPP_SERVER_ARGS_ with additional Llama.cpp server process start arguments
|
||
to your _.env_ file.
|
||
|
||
## Upgrading
|
||
|
||
To update AI-Suite images to their latest versions (n8n, Open WebUI, etc.), run
|
||
the _update_ operation command argument optionally preceded by the specified profile
|
||
arguments (functional modules).
|
||
Alternatively, you run the install_ operation argument to perform an update without
|
||
the confirmation prompt. Using _install_, AI-Suite will assume you are proceeding
|
||
as if performing a new installation - i.e. no previous installation exists.
|
||
|
||
`suite_services.py` [`--profile` arguments] `--operation` argument:
|
||
|
||
| Argument | Operation |
|
||
| -----------: | ------: |
|
||
| `update` | Update - stop, pull and restart specified container images |
|
||
| `install` | New install - proceed as if performing a new installation |
|
||
|
||
> [!CAUTION]
|
||
> Named and anonymous data volumes will be deleted. Be sure to backup your data
|
||
> to avoid data loss if your intent is to _update_ an existing installation.
|
||
<!-- -->
|
||
> [!NOTE]
|
||
> The `suite_services.py` _update_ operation argument will stop, pull the image
|
||
> and restart containers for the specified `--profile` arguments. However, to
|
||
> update the entire suite, simply omit the profile arguments.
|
||
>
|
||
> If no profile arguments are specified, container images for all functional
|
||
> modules plus Docker Ollama will be _pulled_ but only functional module
|
||
> containers (n8n, Open WebUI, OpenCode etc.) will be _started_. Docker Ollama
|
||
> containers will not be started unless they are explicitly specified as a
|
||
> profile argument.
|
||
|
||
Example command to full update:
|
||
|
||
```powershell
|
||
python suite_services.py --operation update
|
||
```
|
||
|
||
Example command for full (new) install with Docker Ollama running on CPU:
|
||
|
||
```powershell
|
||
python suite_services.py --profile ai-all cpu --operation install
|
||
```
|
||
|
||
### Manual steps to upgrade
|
||
|
||
- <details>
|
||
<summary>Stop services for running containers</summary>
|
||
|
||
```powershell
|
||
# Before starting the update, stop services for running containers
|
||
docker compose -p ai-suite -f docker-compose.yml --profile <arguments> down --volumes
|
||
```
|
||
|
||
</details>
|
||
|
||
- <details>
|
||
<summary>Update images built locally (Supabase, Open WebUI Filesystem)</summary>
|
||
|
||
```powershell
|
||
# First, pull the Supabase GitHub repository
|
||
cd ai-suite/supabase
|
||
git pull
|
||
```
|
||
|
||
</details>
|
||
|
||
- <details>
|
||
<summary>Perform the Supabase Docker Compose build</summary>
|
||
|
||
```powershell
|
||
# Next, perform the Supabase Docker Compose build
|
||
# Note: If in public environment, add '-f ../docker-compose.override.public.yml'
|
||
docker compose -p ai-suite -f docker/docker-compose.yml up -d --build --remove-orphans
|
||
```
|
||
|
||
</details>
|
||
|
||
- <details>
|
||
<summary>Pull the Open WebUI Tools Fileserver repository</summary>
|
||
|
||
```powershell
|
||
# Next, pull the Open WebUI Tools Fileserver
|
||
cd ../open-webui/tools
|
||
git pull
|
||
```
|
||
|
||
</details>
|
||
|
||
- <details>
|
||
<summary>Perform the, Fileserver Docker Compose build</summary>
|
||
|
||
```powershell
|
||
# Next, perform the, Fileserver Docker Compose build
|
||
# Note: If in public environment, add '-f ../../../../docker-compose.override.public.yml'
|
||
docker compose -p ai-suite -f servers/filesystem/compose.yaml up -d --build --remove-orphans
|
||
```
|
||
|
||
</details>
|
||
|
||
- <details>
|
||
<summary>Return to AI-Suite root directory</summary>
|
||
|
||
```powershell
|
||
# Return to AI-Suite root directory
|
||
cd ../../
|
||
```
|
||
|
||
</details>
|
||
|
||
- <details>
|
||
<summary>Pull latest versions of container images</summary>
|
||
|
||
```powershell
|
||
# Pull latest versions of container images for specified profile arguments
|
||
docker compose -p ai-suite -f docker-compose.yml --profile <arguments> pull
|
||
```
|
||
|
||
</details>
|
||
|
||
- <details>
|
||
<summary>Start services again for specified profile arguments</summary>
|
||
|
||
```powershell
|
||
# Start services again for specified profile arguments
|
||
# Note: If in public environment, replace 'docker-compose.override.private.yml' with 'docker-compose.override.public.yml'
|
||
docker compose -p ai-suite -f docker-compose.yml -f docker-compose.override.private.yml --profile <arguments> up -d --build --remove-orphans
|
||
```
|
||
|
||
</details>
|
||
|
||
Replace profile `<arguments>` with `ai-all` to update all container images or
|
||
with your desired functional modules, e.g. `n8n`, `opencode` etc, plus your CPU/GPU
|
||
argument [`cpu` | `gpu-nvidia` | `gpu-amd`] if you are running Ollama in Docker.
|
||
See the profile arguments table above for all arguments.
|
||
|
||
## Accessing local files
|
||
|
||
Some **AI-Suite** functional modules require access to a project workspace, a
|
||
shared data folder and/or its configuration file located on the Docker host.
|
||
These resources are mounted from the host to the module container the using a
|
||
Docker Compose _volume_ _bind mount_.
|
||
|
||
<details>
|
||
<summary>AI-Suite Docker Compose bind mounts</summary>
|
||
|
||
```yaml
|
||
<container>:
|
||
- <host path>:<container path>[:<read/write access>]
|
||
```
|
||
|
||
**n8n** creates a `shared` folder located at `/data/shared` - use this path in
|
||
nodes that interact with the host filesystem. Additional folders include the
|
||
`n8n-files` folder located at `/home/node/.n8n-files`, the `projects` folder
|
||
located at `/home/node/projects` and the `data` folder located at `/data`.
|
||
The host root path is `./n8n/data`.
|
||
|
||
```yaml
|
||
n8n:
|
||
- ./n8n/local-files:/home/node/.n8n-files
|
||
- ./n8n/data:/data
|
||
- ${PROJECTS_PATH:-./n8n/local-files}:/home/node/projects
|
||
|
||
n8n-import:
|
||
- ./n8n/data:/data
|
||
```
|
||
|
||
**Open WebUI MCPO** OpenAPI configuration file.
|
||
|
||
```yaml
|
||
open-webui-mcpo:
|
||
- ./open-webui/mcpo/config.json:/app/config.json
|
||
```
|
||
|
||
**Open WebUI Filesystem** local project files access.
|
||
|
||
```yaml
|
||
open-webui-filesystem:
|
||
- ${PROJECTS_PATH:-../shared}:/nonexistent/tmp
|
||
```
|
||
|
||
**Open WebUI Pipelines** shared files access.
|
||
|
||
```yaml
|
||
open-webui-pipelines:
|
||
- ./open-webui/piplines:/root/.pipelines
|
||
```
|
||
|
||
**OpenCode** configuration file and local project files access.
|
||
|
||
```yaml
|
||
opencode:
|
||
- ./opencode/opencode.jsonc:/root/.config/opencode/opencode.jsonc
|
||
- ${PROJECTS_PATH:-./opencode}:/root/projects
|
||
```
|
||
|
||
**Flowise** shared files access.
|
||
|
||
```yaml
|
||
flowise:
|
||
- ./flowise:/root/.flowise
|
||
```
|
||
|
||
**SearXNG** shared files access.
|
||
|
||
```yaml
|
||
searxng:
|
||
- ./searxng:/etc/searxng:rw
|
||
```
|
||
|
||
**Caddy** configuration file and addond folder access.
|
||
|
||
```yaml
|
||
caddy:
|
||
- ./caddy/Caddyfile:/etc/caddy/Caddyfile:ro
|
||
- ./caddy/addons:/etc/caddy/addons:ro
|
||
```
|
||
|
||
</details>
|
||
|
||
### n8n Nodes that interact with the local filesystem
|
||
|
||
- [MCP Client](https://docs.docker.com/ai/mcp-catalog-and-toolkit/dynamic-mcp/)
|
||
- [MCP Client (node)](https://modelcontextprotocol.io/docs/getting-started/intro/)
|
||
- [Read/Write Files from Disk](https://docs.n8n.io/integrations/builtin/core-nodes/n8n-nodes-base.filesreadwrite/)
|
||
- [Local File Trigger](https://docs.n8n.io/integrations/builtin/core-nodes/n8n-nodes-base.localfiletrigger/)
|
||
- [Execute Command](https://docs.n8n.io/integrations/builtin/core-nodes/n8n-nodes-base.executecommand/)
|
||
|
||
## Troubleshooting
|
||
|
||
Here are solutions to common issues you might encounter:
|
||
|
||
### Supabase Issues
|
||
|
||
- **Supabase Pooler Restarting**: If the supabase-pooler container keeps
|
||
restarting itself, follow the instructions in [this GitHub issue](https://github.com/supabase/supabase/issues/30210#issuecomment-2456955578).
|
||
|
||
- **Supabase Analytics Startup Failure**: If the supabase-analytics container
|
||
fails to start after changing your Postgres password, delete the folder `supabase/docker/volumes/db/data`.
|
||
|
||
- **If using Docker Desktop**: Go into the Docker settings and make sure
|
||
"Expose daemon on tcp://localhost:2375 without TLS" is turned on
|
||
|
||
- **Supabase Service Unavailable** - Make sure you don't have an "@" character
|
||
in your Postgres password! If the connection to the kong container is working
|
||
(the container logs say it is receiving requests from n8n) but n8n says it
|
||
cannot connect, this is generally the problem from what the community has
|
||
shared. Other characters might not be allowed too, the @ symbol is just the
|
||
one I know for sure!
|
||
|
||
- **SearXNG Restarting**: If the SearXNG container keeps restarting, run the
|
||
command "chmod 755 searxng" within the ai-suite folder so SearXNG has the
|
||
permissions it needs to create the uwsgi.ini file.
|
||
|
||
- **Files not Found in Supabase Folder** - If you get any errors around files
|
||
missing in the supabase/ folder like .env, docker/docker-compose.yml, etc. This
|
||
most likely means you had a "bad" pull of the Supabase GitHub repository when
|
||
you ran the suite_services.py script. Delete the supabase/ folder within the
|
||
Local AI Package folder entirely and try again.
|
||
|
||
### GPU Support Issues
|
||
|
||
- **Windows GPU Support**: If you're having trouble running Ollama with GPU
|
||
support on Windows with Docker Desktop:
|
||
|
||
1. Open Docker Desktop settings
|
||
2. Ensure 'Enable WSL2 backend' is enabled
|
||
3. See the [Docker GPU documentation](https://docs.docker.com/desktop/features/gpu/)
|
||
for more details
|
||
|
||
- **Linux GPU Support**: If you're having trouble running Ollama with GPU
|
||
support on Linux, follow the [Ollama Docker instructions](https://github.com/ollama/ollama/blob/main/docs/docker.md).
|
||
|
||
## 🛍️ More AI templates
|
||
|
||
For more AI workflow ideas, visit the [**official n8n AI template
|
||
gallery**](https://n8n.io/workflows/?categories=AI). From each workflow,
|
||
select the **Use workflow** button to automatically import the workflow into
|
||
your local n8n instance.
|
||
|
||
## 👓 Recommended reading
|
||
|
||
Useful content for deeper understanding AI concepts.
|
||
|
||
- [AI agents for developers: from theory to practice with n8n](https://blog.n8n.io/ai-agents/)
|
||
- [Tutorial: Build an AI workflow in n8n](https://docs.n8n.io/advanced-ai/intro-tutorial/)
|
||
- [Langchain Concepts in n8n](https://docs.n8n.io/advanced-ai/langchain/langchain-n8n/)
|
||
- [Demonstration of key differences between agents and chains](https://docs.n8n.io/advanced-ai/examples/agent-chain-comparison/)
|
||
|
||
## 📜 License
|
||
|
||
This project (originally curated by the n8n team, then Cole Medin, links at the
|
||
top of the README) is licensed under the Apache License 2.0 - see the [LICENSE](LICENSE)
|
||
file for details.
|