
AI-Suite
AI-Suite is intended to be an end-to-end path from zero to working AI workflows for developers and those who want to enabe a local, private AI solution.
It provides an open, curated, pre-configured Docker Compose configuration file that bootstraps fully featured Local AI Agents and a Low/No Code environment on a self-hosted n8n platform, enabling users to focus on building solutions that employ robust AI workflows.
Portions of AI-Suite extends Cole Medin's Self-hosted AI Package which is built on the n8n-io Self-hosted AI Starter Kit.
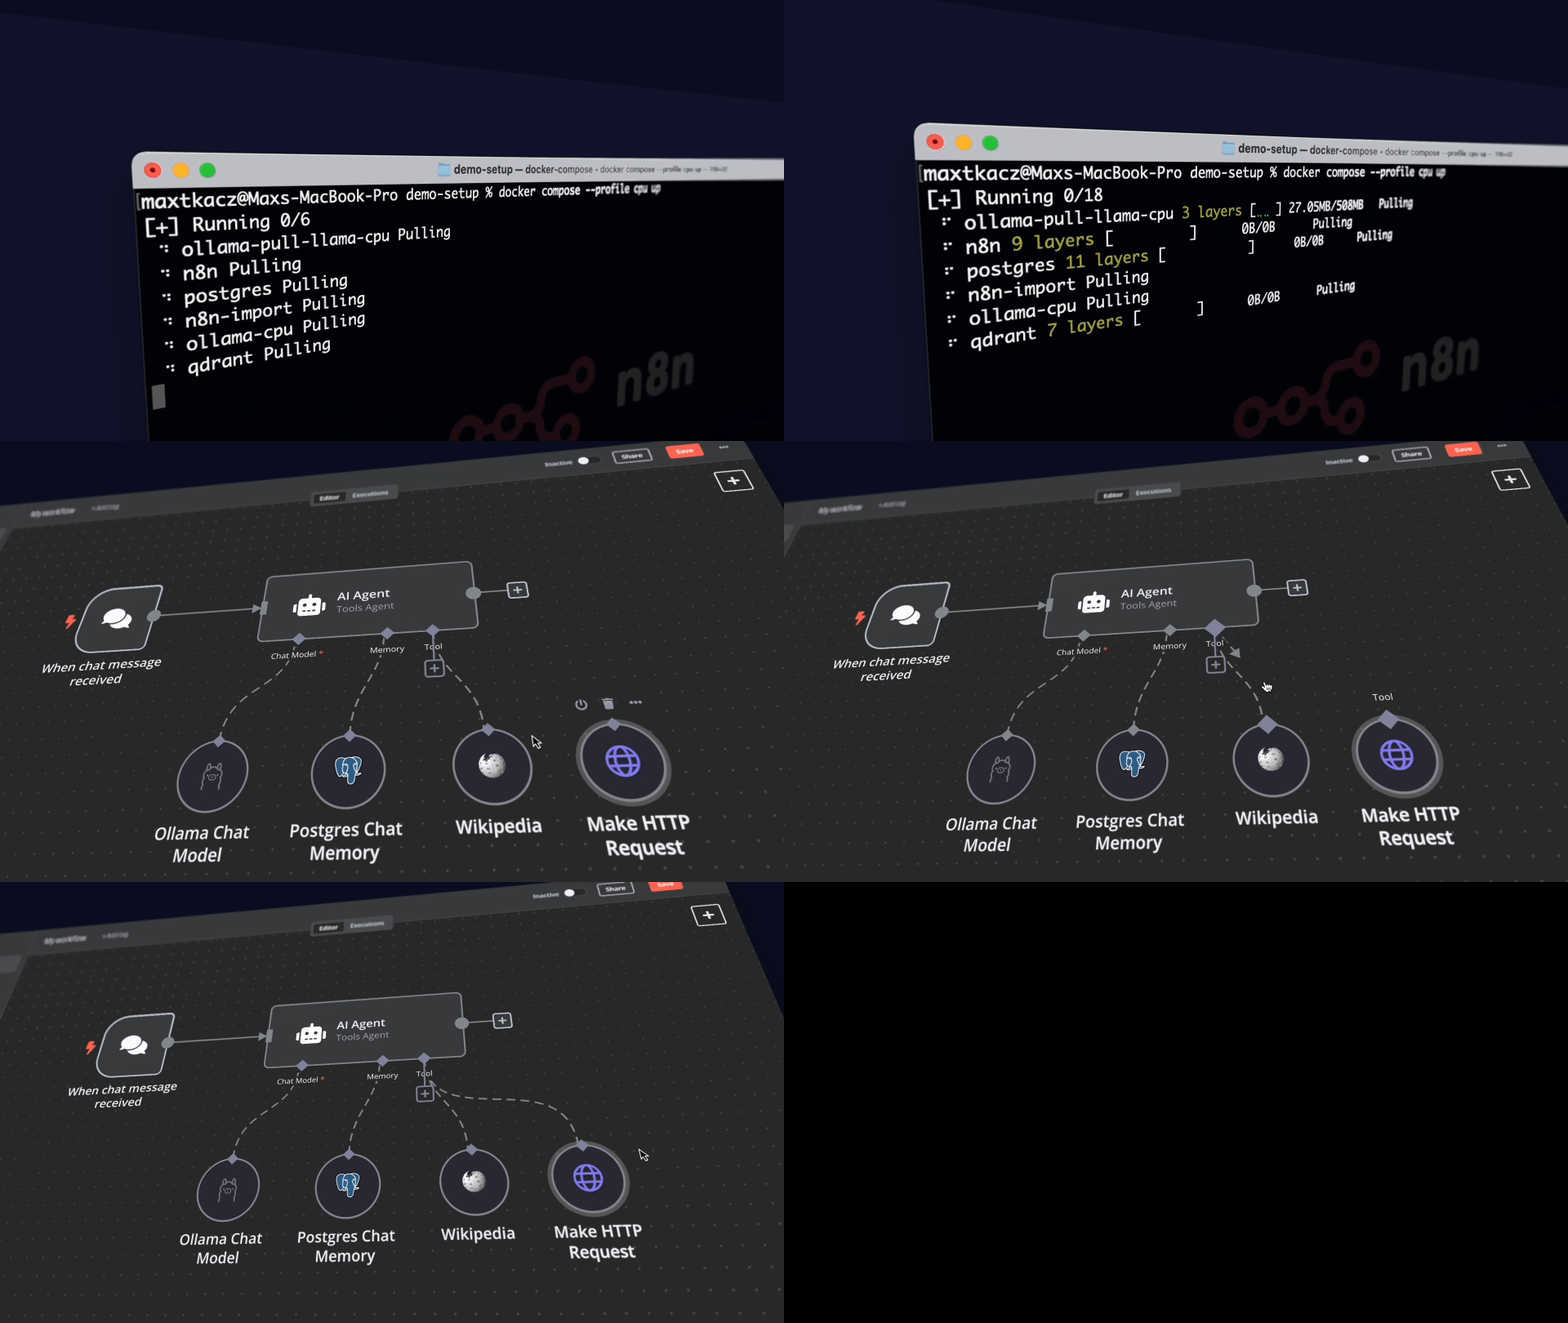
Curated by Trevor SANDY - https://github.com/trevorsandy.
What’s included
✅ Self-hosted n8n - Automation platform with over 400 integrations and advanced AI components.
✅ Open WebUI - ChatGPT-like interface to privately interact with your local models and N8N agents.
✅ OpenCode - open source agent that helps you write code in your terminal.
✅ Ollama - Cross-platform LLM platform to install and run the latest LLMs.
✅ Supabase - Open source database as a service, most widely used database for AI agents.
✅ Flowise - No/low-code AI agent builder that pairs very well with n8n.
✅ Qdrant - Open source, high performance vector store with an comprehensive API.
✅ PostgreSQL - Workhorse of the Data Engineering world, backend for Langfuse.
✅ MCP Gateway - Reverse proxy and management layer for MCP servers.
✅ Neo4j - Knowledge graph engine that powers tools like GraphRAG, LightRAG, and Graphiti.
✅ Redis (Valkey) - High-performance key/value datastore, supports caching and message queues workloads.
✅ SearXNG - Open source internet metasearch engine, aggregates results from up to 229 search services.
✅ Langfuse - Open source LLM engineering platform for agent observability.
✅ MinIO - High-performance, S3-compatible object storage solution.
✅ ClickHouse - Open source, database management system that can generate analytical data reports in real-time.
✅ Caddy - Managed HTTPS/TLS for custom domains.
Prerequisites
Before you begin, make sure you have the following software installed:
-
Python - To run the setup script.
Import modules
os sys datetime subprocess pathlib shutil time argparse platform dotenv tempfile textwrap re -
Git/GitHub Desktop - For easy repository management.
-
Docker/Docker Desktop - Required to setup and run all AI-Suite services.
Docker Compose commands
If you are using a machine without the
docker composeapplication available by default, run these commands to install Docker compose:DOCKER_COMPOSE_VERSION=$(curl -s https://api.github.com/repos/docker/compose/ releases/latest | grep 'tag_name' | cut -d\\" -f4) sudo curl -L "https://github.com/docker/compose/releases/download/${DOCKER_COMPOSE_VERSION}/docker-compose-linux-x86_64" -o /usr/local/bin docker-compose sudo chmod +x /usr/local/bin/docker-compose sudo mkdir -p /usr/local/lib/docker/cli-plugins sudo ln -s /usr/local/bin/docker-compose /usr/local/lib/docker/cli-plugins/docker-compose
Installation
-
Clone the repository and navigate to the project directory:
git clone https://github.com/trevorsandy/ai-suite.git cd ai-suite -
Make a copy of
.env.examplerenamed to.envin the project directory.cp .env.example .env # update secrets and passwords inside -
Set the following required environment variables:
Credential environment variables
############
# Generating Credentials
# OpenSSL: Available by default on Linux/Mac via command `openssl rand -hex 32`
#   For Windows, use 'WSL2', 'Git Bash' terminal installed with git or from cmd
#   run the command: python -c "import secrets; print(secrets.token_hex(32))"
#
# Password: Use Python command to generate 16-character strong password:
#   python3 -c "import secrets;import string; alphabet = string.ascii_letters + string.   digits;\
#               password = ''.join(secrets.choice(alphabet) for i in range(16));\
#               print(password)"
#
# JWT Tokens: Use https://jwtsecrets.com/#generator to generate keys and tokens
#   ranging from 8 to 128 characters long.
############

############
# [required]
# n8n credentials - use OpenSSL for both
############

# Master key used to encrypt sensitive credentials that n8n stores
N8N_ENCRYPTION_KEY=change_me_to_a_long_super-secret-key
# Shared secret between n8n containers and runners sidecars
N8N_RUNNERS_AUTH_TOKEN=change_me_to_a_long_super-secret-key
# Specific JWT secret. By default, n8n generates one on start
N8N_USER_MANAGEMENT_JWT_SECRET=change_me_to_a_longer_even-more-secret

############
# [required]
# Supabase Secrets
############

JWT_SECRET=your-super-secret-jwt-token-at-least-40-characters-long
ANON_KEY=your-super-secret-jwt-key-see-https://supabase.com/docs/guides/self-hosting/docker#generate-api-keys
SERVICE_ROLE_KEY=your-super-secret-jwt-key-see-https://supabase.com/docs/guides/self-hosting/docker#generate-api-keys
DASHBOARD_USERNAME=supabase
DASHBOARD_PASSWORD=your-super-secret-password
POOLER_TENANT_ID=your-tenant-id

############
# [required]
# PostgreSQL database user password
############

POSTGRES_PASSWORD=your-super-secret-postgres-password

############
# [required]
# Flowise - authentication configuration
############

FLOWISE_PASSWORD=your-super-secret-flowise-password

############
# [required]
# Neo4j - username and password combination
############

NEO4J_AUTH=neo4j-user/your-super-secret-password

############
# [required]
# Langfuse credentials
############

CLICKHOUSE_PASSWORD=your-super-secret-password-1
MINIO_ROOT_PASSWORD=your-super-secret-password-2
LANGFUSE_SALT=your-super-secret-key-1   # use OpenSSL
NEXTAUTH_SECRET=your-super-secret-key-2 # use OpenSSL
ENCRYPTION_KEY=your-super-secret-key-3  # use OpenSSL

############
# [required for production]
# Caddy Config
############

# N8N_HOSTNAME=n8n.yourdomain.com
# WEBUI_HOSTNAME=openwebui.yourdomain.com
# FLOWISE_HOSTNAME=flowise.yourdomain.com
# SUPABASE_HOSTNAME=supabase.yourdomain.com
# LANGFUSE_HOSTNAME=langfuse.yourdomain.com
# OLLAMA_HOSTNAME=ollama.yourdomain.com
# LLAMACPP_HOSTNAME=llama.cpp.yourdomain.com
# SEARXNG_HOSTNAME=searxng.yourdomain.com
# NEO4J_HOSTNAME=neo4j.yourdomain.com
# LETSENCRYPT_EMAIL=internal

...

############
# Logs - Configuration for Analytics
# Please refer to https://supabase.com/docs/reference/self-hosting-analytics/introduction
############

# Change vector.toml sinks to reflect this change
# these cannot be the same value
LOGFLARE_PUBLIC_ACCESS_TOKEN=your-super-secret-and-long-logflare-key-public
LOGFLARE_PRIVATE_ACCESS_TOKEN=your-super-secret-and-long-logflare-key-private

...
Important
Make sure to generate secure random values for all secrets. Never use the example values in production.
AI-Suite uses the suite_services.py script for the installation command
that handles the AI-Suite functional module selection, llama CPU/GPU configuration,
and starting Supabase and Open WebUI Filesystem when specified.
This script is also used for operation commands that start, stop, stop-llama,
pause, unpause, update and install the AI-Suite services using the optional
--operation argument. A llama (Ollama/Llama.cpp) check is performed when it is
assumed llama is running from the Docker Host. If llama is determined to be installed
but not running, an attempt to launch the Ollama/Llama.cpp service is executed
on install, start and unpause. The check will also attempt to stop the
running llama service (in addition to stopping the AI-Suite services) when the
stop-llama operational command is specified.
Both installation and operation commands utilize the optional --profile
arguments to specify which AI-Suite functional modules and which llama CPU/GPU
configuration to use. When no functional profile argument is specified, the
default functional module open-webui is used, Likewise, if no CPU/GPU configuration
profile is specified, it is assumed llama is being run from the Docker Host.
Multiple profile arguments (functional modules) are supported.
The --environment command allows the installation to be defined as private
(default) or public. A public install restricts the communication ports exposed
to the network.
suite_services.py --profile functional module arguments
| Argument | Functional Module |
|---|---|
n8n |
n8n - automation platform |
opencode |
OpenCode - low-code, no-code agent |
open-webui |
Open WebUI - chatbot interface |
open-webui-mcpo |
Open WebUI MCPO - MCP to OpenAPI translator |
open-webui-pipe |
Open WebUI Pipelines - agent tools and functions |
flowise |
Flowise - complementary agent builder |
supabase |
Supabase - alternative database |
searxng |
SearXNG - internet metasearch |
langfuse |
Langfuse - agent observability platform |
neo4j |
Neo4j - knowledge graph |
caddy |
Caddy - managed https/tls server |
n8n-all |
n8n - complete bundle |
open-webui-all |
Open WebUI - complete bundle |
ai-all |
AI-Suite full stack - all modules |
suite_services.py --profile llama CPU/GPU argument:
| Argument | Llama CPU/GPU |
|---|---|
cpu |
Ollama - run on CPU |
gpu-nvidia |
Ollama - run on Nvidia GPU |
gpu-amd |
Ollama - run on AMD GPU |
cpp-cpu |
Llama.cpp - run on CPU |
cpp-gpu-nvidia |
Llama.cpp - run on Nvidia GPU |
cpp-gpu-amd |
Llama.cpp - run on AMD GPU |
Example command:
python suite_services.py --profile n8n opencode gpu-nvidia
suite_services.py ... --operation argument:
| Argument | Operation |
|---|---|
start |
Start - start the previously stopped, specified profile containers |
stop |
Stop - shut down the specified profile containers |
stop-llama |
Stop - perform stop and shut down Ollama/Llama.cpp on Host |
pause |
Pause - pause the specified profile containers |
unpause |
Unpause - unpause the previously paused profile containers |
Example command:
python suite_services.py --profile n8n opencode gpu-nvidia --operation stop
If you intend to install Supabase, before running suite_services.py, setup the
Supabase environment variables using their self-hosting guide.
For Docker OLLAMA with Nvidia GPU users
python suite_services.py --profile gpu-nvidia
Note
If you have not used your Nvidia GPU with Docker before, please follow the Ollama Docker instructions.
For Docker OLLAMA with AMD GPU users on Linux
python suite_services.py --profile gpu-amd
For OLLAMA on Mac /Apple Silicon or OLLAMA running in the Host
If you're using a Mac with an M1 or newer processor, you can't expose your GPU to the Docker instance, unfortunately. There are two options in this case:
-
Run ai-suite fully on CPU:
python suite_services.py --profile cpu -
Run Ollama on your Host for faster inference, and connect to that from the n8n instance:
python suite_services.py --profile n8nIf you want to run Ollama on your Mac, check the Ollama homepage for installation instructions.
For users running OLLAMA on the Host
If you're running OLLAMA in your Docker Host (not in Docker), modify the OLLAMA_HOST environment variable in the n8n service configuration and update the x-n8n section in your .env file:
OLLAMA_HOST=host.docker.internal:11434
#OLLAMA_HOST=ollama:11434

# ... other configurations ...

# When running OLLAMA in the Host and Open WebUI in Docker:
OLLAMA_BASE_URL=http://host.docker.internal:11434
#OLLAMA_BASE_URL=http://localhost:11434
... or youe Docker Compose file:
x-n8n: &service-n8n
  # ... other configurations ...
  environment:
    # ... other environment variables ...
    - OLLAMA_HOST=host.docker.internal:11434
For everyone else
python suite_services.py --profile cpu
The environment argument
The suite_services.py script supports a private (default) and public
environment argument:
- private: you are deploying the stack in a safe environment, all AI-Suite ports are accessible
- public: the stack is deployed in a public environment, all AI-Suite ports except 80 and 443 are closed
suite_services.py ... --environment arguments:
| Argument | Scope |
|---|---|
private |
Private network |
public |
Public network |
The AI-Suite stack initialized with...
python suite_services.py --profile gpu-nvidia --environment private
is equal to being initialized with:
python suite_services.py --profile gpu-nvidia
Deploying to the Cloud
Prerequisites for the below steps
- Linux machine (preferably Unbuntu) with Nano, Git, and Docker installed
Extra steps
Before running the above commands to pull the repo and install everything:
Warning
ufw does not shield ports published by Docker, because the iptables rules configured by Docker are analyzed before those configured by ufw. There is a solution to change this behavior, but that is out of scope for this project. Just make sure that all traffic runs through the Caddy service via port 443. Port 80 should only be used to redirect to port 443.
-
Run the commands as root to open up the necessary ports:
ufw enable ufw allow 80 && ufw allow 443 ufw reload -
Run the
suite_services.pyscript with the environment argument public to indicate you are going to run the package in a public environment. The script will make sure that all ports, except for 80 and 443, are closed down, e.g.python3 suite_services.py --profile gpu-nvidia --environment public -
Set up A records for your DNS provider to point your subdomains you'll set up in the .env file for Caddy to the IP address of your cloud instance.
For example, A record to point n8n to [cloud instance IP] for n8n.yourdomain.com
Note
If you are using a cloud machine without the "docker compose" command available by default such as a Ubuntu GPU instance on DigitalOcean, run these commands before running suite_services.py:
Docker Compose setup commands
DOCKER_COMPOSE_VERSION=$(curl -s https://api.github.com/repos/docker/compose/releases/latest | grep 'tag_name' | cut -d\\" -f4)
sudo curl -L "https://github.com/docker/compose/releases/download/${DOCKER_COMPOSE_VERSION}/docker-compose-linux-x86_64" -o /usr/local/bin/docker-compose
sudo chmod +x /usr/local/bin/docker-compose
sudo mkdir -p /usr/local/lib/docker/cli-plugins
sudo ln -s /usr/local/bin/docker-compose /usr/local/lib/docker/cli-plugins/docker-compose
⚡️ Quick start and usage
All components of the self-hosted AI-Suite, except if running Ollama from your
host, is installed through suite_services.py and managed through a Docker Compose
file pre-configured with network and disk so there isn’t much else you need to
install. After completing the installation steps above, follow the steps below
to get started. First, start with n8n.
Use the following settings to confirm or upate n8n Credentials.
-
Local Ollama service: base URL http://ollama:11434/ (n8n config), http://localhost:11434/ (browser)
-
Local QdrantApi database: base URL http://qdrant:6333/ (n8n config), http://localhost:6333/ (browser)
-
Postgres account: use POSTGRES_HOST, POSTGRES_USER, and POSTGRES_PASSWORD from your .env file.
-
Google Drive: This credential is optional. Follow this guide from n8n.
Important
For Supabase, POSTGRES_HOST is 'db' since that is the name of the service running Supabase.
Note
If you are running OLLAMA on your Host, for the credential Local Ollama service, set the base URL to http://host.docker.internal:11434/ and set Local QdrantApi database to http://host.docker.internal:6333/.
Don't use localhost for the redirect URI, instead, use another domain. It will still work! Alternatively, you can set up local file triggers.
-
Open http://localhost:5678/ in your browser to initialize and set up n8n. You’ll only have to set your admin login credentials once. You are NOT creating an account with n8n in the setup here, it is only a local account for your instance!
- Go to http://localhost:5678/home/credentials to configure credentials.
- Click on Local QdrantApi database and set the base URL as specified above.
- Click on Local Ollama service and set the base URL as specified above.
- Click on Create credential, enter Postgres in the search field and follow the subsequent dialogs to setup the Postgres account as specified above.
-
Open the Demo workflow and confirm the credentials for Local Ollama service is properly configured.
-
Select Test workflow to confirm the workflow is properly configured. If this is the first time you’re running the workflow, you may need to wait until Ollama finishes downloading the specified model. You can inspect the docker console logs to check on the progress.
-
Toggle the Demo workflow as active and treat the RAG AI Agent workflows.
Configure additional n8n workflows as desired:
-
Next, configure Open WebUI. Open http://localhost:8080/ in your browser to initialize and set up Open WebUI. You’ll only have to set your admin login credentials once. You are NOT creating an account with Open WebUI in the setup here, it is only a local account for your instance!
-
Go to Workspace → Functions to setup the n8n Pipes (Pipeline) function. This function will enable integration with n8n as an entry in your model dropdown list.
- Click on New Function
- Enter n8n Pipeline at Function Name and Function ID will auto-populate with n8n_Pipeline
- Enter An optimized streaming-enabled pipeline for interacting with n8n workflows in Description
- Copy the n8n_Pipeline function code at n8n.py
(or the downloaded instance at
./open-webui/functions/owndev/pipelines/n8n/n8n.py) and paste it into the edit dialog.
-
Copy the webhook URL from the n8n_Pipeline function set in step 6.
-
Click on the gear icon and set the n8n_url to the webhook URL you copied in a previous step.
-
Toggle the function on and now it will be available in your model dropdown in the top left.
To open n8n, visit http://localhost:5678/ from your browser.
To open Open WebUI, visit http://localhost:3000/ from your browser.
To open OpenCode run ./opencode/run_opencode_docker.py from a new terminal.
Additional Configuration
With n8n, you have access to over 400 integrations and a suite of basic and advanced AI nodes such as: AI Agent, Text classifier, and Information Extractor nodes.
To keep everything local, use the Ollama node for your language model and Qdrant as your vector store.
Note
AI-Suite is designed to help you get started with self-hosted AI workflows. While it is not fully optimized for production environments, it combines robust components that work well together for personal porjects. Of course, you can further customize it to meet your specific needs.
PROJECTS_PATH environment variable
You can use the PROJECTS_PATH environment variable to allow n8n,
OpenCode, and Open WebUI Filesystem access to your project files.
During the installation process, if the key is not already present (or has no
value) in your .env file, the key and value are written to the working
environment variables with the value set to ~/projects. You can override this
behaviour by manually setting your desired path for this key in the .env file.
PROJECTS_PATH forms a volume bind mount to container paths for the functional
modules described above:
| Module | Container | Bind Mount |
|---|---|---|
| n8n | n8n | /home/node/projects |
| OpenCode | opencode | /root/projects |
| Open WebUI Tool Filesystem | open-webui-filesystem | /nonexistent/tmp |
n8n
-
MCP Client
-
Configure MCP Client credentials.
- In Nodes panel, search for
MCP. - Select
MCP Client. - Set MCP Endpoint URL:
http://host.docker.internal:8060.
- In Nodes panel, search for
-
-
MCP Client (node)
-
Install community nodes - You may need to restart container.
- Go to Settings → Community nodes
- Use npm Package Name: n8n-nodes-mcp.
- Install node.
-
Configure MCP Client (node) credentials.
- In Nodes panel, search for
MCP. - Select
MCP Client (node). - In the node settings, select Connection Type:
HTTP Streamable. - Create new credentials of type MCP Client (HTTP Streamable) API.
- Set HTTP Streamable URL:
http://host.docker.internal:3001/stream. - Add any required headers for authentication.
- In Nodes panel, search for
-
Open WebUI
-
MCPO
- Your MCP tool is available at http://host.docker.internal:8090.
- Test it live at http://host.docker.internal:8090/docs.
- Using the config file ./open-webui/mcpo/config.json, set additional configuration settings as desired.
- As we are using the config file config.json, each tool will be accessible under its own unique route, e.g. http://host.docker.internal:8090/MCP_DOCKER.
-
Locally available functions
Pipes:
-
n8n
./open-webui/functions/owndev/pipelines/n8n/ -
Anthropic
./open-webui/functions/open-webui/functions/pipes/anthropic/ -
Open AI
./open-webui/functions/open-webui/functions/pipes/openai/
Filters:
-
Various filters
./open-webui/functions/owndev/filters/ -
Agent hotswap
./open-webui/functions/open-webui/functions/filters/agent_hotswap/ -
Context clip
./open-webui/functions/open-webui/functions/filters/context_clip/ -
Dynamic vision router
./open-webui/functions/open-webui/functions/filters/dynamic_vision_router/ -
Max turns
./open-webui/functions/open-webui/functions/filters/max_turns/ -
Moderation
./open-webui/functions/open-webui/functions/filters/moderation/ -
Summarizer
./open-webui/functions/open-webui/functions/filters/summarizer/
-
Manual Configuration.
- Navigate to the locally available functions folder containing your desired
function
.pyfile. - Copy the complete code from the function file (e.g. main.py)
- Add as a new Function in OpenWebUI → Admin Panel → Functions
- Configure function-specific settings as needed - follow function README for details.
- Enable the Function (also be sure to enable to Agent Swapper Icon in chat)
- Navigate to the locally available functions folder containing your desired
function
-
-
Filesystem (Server Tool)
- Your Filesystem server is available at http://host.docker.internal:8091/docs.
-
Pipelines
-
Connect to Open WebUI.
- Navigate to the Settings → Connections → OpenAI API section in Open WebUI.
- Set the API URL to
http:\\host.docker.internal:9099and the API key to0p3n-w3bu!. Your pipelines should now be active.
-
Manage Configurations.
- In the admin panel, go to Admin Settings → Pipelines tab.
- Select your desired pipeline and modify the valve values directly from WebUI.
-
Open Code
-
run_opencode_docker.py
- Copy
./opencode/run_opencode_docker.pyto or run it from your current work project.
- Copy
-
opencode.jsonc
- Using the config file at ./opencode/opencode.jsonc
- Set additional configuration settings as desired.
-
PROJECT_PATH environment variable
- Set the
PROJECT_PATHenv variable to your working project directory before running OpenCode if you wish to set the work path to your current project but you will NOT launch OpenCode from the root of your working project. If thePROJECT_PATHvar is not defined, the currend working directory from which OpenCode was launched is assumed.
- Set the
-
project_path argument
-
You can also pass a project_path argument to
./opencode/run_opencode_docker.pywith-p,--project_pathso an example command would be:python run_opencode_docker.py --project_path 'opencode'
-
Note
It is recommended that your working project directory be within and relative to the path set for
PROJECTS_PATHin the AI-Suite .env file - see PROJECTS_PATH environment variable section described above.Important: The format of the
PROJECT_PATHentry must be the portion of your project path that is relative to the entry specified inPROJECTS_PATH. For example, if the full path to your project is~/projects/ai-suite/opencode, yourPROJECT_PATHentry must beai-suite/opencode, if yourPROJECTS_PATHentry is~/projects.When set,
PROJECT_PATHis appended to the OpenCode container bind mounted path/root/projectsand the resulting path is set as work_dir to form the OpenCode Docker exec command's workdir=work_dir keyword argument.
Ollama or Llama.cpp - running on host
-
LLAMA_PATH environment variable
- If Ollama is installed in a custom location or you are using Llama.cpp,
Add
LLAMA_PATHwith its absolute path (including the file name) to your .env file.
- If Ollama is installed in a custom location or you are using Llama.cpp,
Add
-
OLLAMA_SERVER_ARGS environment variable
- Add OLLAMA_SERVER_ARGS with additional Ollama server process start arguments to your .env file.
-
LLAMACPP_MODELS_DIR environment variable
- If you are using Llama.cpp with models that were not downloaded with
that instance of Llama.cpp, add
LLAMACPP_MODELS_DIRwith said models path to your .env file.
- If you are using Llama.cpp with models that were not downloaded with
that instance of Llama.cpp, add
-
LLAMACPP_SERVER_ARGS environment variable
- Add LLAMACPP_SERVER_ARGS with additional Llama.cpp server process start arguments to your .env file.
Upgrading
To update AI-Suite images to their latest versions (n8n, Open WebUI, etc.), run the update operation command argument optionally preceded by the specified profile arguments (functional modules). Alternatively, you run the install_ operation argument to perform an update without the confirmation prompt. Using install, AI-Suite will assume you are proceeding as if performing a new installation - i.e. no previous installation exists.
suite_services.py [--profile arguments] --operation argument:
| Argument | Operation |
|---|---|
update |
Update - stop, pull and restart specified container images |
install |
New install - proceed as if performing a new installation |
Caution
Named and anonymous data volumes will be deleted. Be sure to backup your data to avoid data loss if your intent is to update an existing installation.
Note
The
suite_services.pyupdate operation argument will stop, pull the image and restart containers for the specified--profilearguments. However, to update the entire suite, simply omit the profile arguments.If no profile arguments are specified, container images for all functional modules plus Docker Ollama will be pulled but only functional module containers (n8n, Open WebUI, OpenCode etc.) will be started. Docker Ollama containers will not be started unless they are explicitly specified as a profile argument.
Example command to full update:
python suite_services.py --operation update
Example command for full (new) install with Docker Ollama running on CPU:
python suite_services.py --profile ai-all cpu --operation install
Manual steps to upgrade
-
Stop services for running containers
# Before starting the update, stop services for running containers docker compose -p ai-suite -f docker-compose.yml --profile <arguments> down --volumes -
Update images built locally (Supabase, Open WebUI Filesystem)
# First, pull the Supabase GitHub repository cd ai-suite/supabase git pull -
Perform the Supabase Docker Compose build
# Next, perform the Supabase Docker Compose build # Note: If in public environment, add '-f ../docker-compose.override.public.yml' docker compose -p ai-suite -f docker/docker-compose.yml up -d --build --remove-orphans -
Pull the Open WebUI Tools Fileserver repository
# Next, pull the Open WebUI Tools Fileserver cd ../open-webui/tools git pull -
Perform the, Fileserver Docker Compose build
# Next, perform the, Fileserver Docker Compose build # Note: If in public environment, add '-f ../../../../docker-compose.override.public.yml' docker compose -p ai-suite -f servers/filesystem/compose.yaml up -d --build --remove-orphans -
Return to AI-Suite root directory
# Return to AI-Suite root directory cd ../../ -
Pull latest versions of container images
# Pull latest versions of container images for specified profile arguments docker compose -p ai-suite -f docker-compose.yml --profile <arguments> pull -
Start services again for specified profile arguments
# Start services again for specified profile arguments
# Note: If in public environment, replace 'docker-compose.override.private.yml' with 'docker-compose.override.public.yml'
docker compose -p ai-suite -f docker-compose.yml -f docker-compose.override.private.yml --profile <arguments> up -d --build --remove-orphans
Replace profile <arguments> with ai-all to update all container images or
with your desired functional modules, e.g. n8n, opencode etc, plus your CPU/GPU
argument [cpu | gpu-nvidia | gpu-amd] if you are running Ollama in Docker.
See the profile arguments table above for all arguments.
Accessing local files
Some AI-Suite functional modules require access to a project workspace, a shared data folder and/or its configuration file located on the Docker host. These resources are mounted from the host to the module container the using a Docker Compose volume bind mount.
AI-Suite Docker Compose bind mounts
<container>:
   - <host path>:<container path>[:<read/write access>]
n8n creates a shared folder located at /data/shared - use this path in
nodes that interact with the host filesystem. Additional folders include the
n8n-files folder located at /home/node/.n8n-files, the projects folder
located at /home/node/projects and the data folder located at /data.
The host root path is ./n8n/data.
n8n:
   - ./n8n/local-files:/home/node/.n8n-files
   - ./n8n/data:/data
   - ${PROJECTS_PATH:-./n8n/local-files}:/home/node/projects

n8n-import:
   - ./n8n/data:/data
Open WebUI MCPO OpenAPI configuration file.
open-webui-mcpo:
   - ./open-webui/mcpo/config.json:/app/config.json
Open WebUI Filesystem local project files access.
open-webui-filesystem:
   - ${PROJECTS_PATH:-../shared}:/nonexistent/tmp
Open WebUI Pipelines shared files access.
open-webui-pipelines:
   - ./open-webui/piplines:/root/.pipelines
OpenCode configuration file and local project files access.
opencode:
   - ./opencode/opencode.jsonc:/root/.config/opencode/opencode.jsonc
   - ${PROJECTS_PATH:-./opencode}:/root/projects
Flowise shared files access.
flowise:
   - ./flowise:/root/.flowise
SearXNG shared files access.
searxng:
   - ./searxng:/etc/searxng:rw
Caddy configuration file and addond folder access.
caddy:
   - ./caddy/Caddyfile:/etc/caddy/Caddyfile:ro
   - ./caddy/addons:/etc/caddy/addons:ro
n8n Nodes that interact with the local filesystem
Troubleshooting
Here are solutions to common issues you might encounter:
Supabase Issues
-
Supabase Pooler Restarting: If the supabase-pooler container keeps restarting itself, follow the instructions in this GitHub issue.
-
Supabase Analytics Startup Failure: If the supabase-analytics container fails to start after changing your Postgres password, delete the folder
supabase/docker/volumes/db/data. -
If using Docker Desktop: Go into the Docker settings and make sure "Expose daemon on tcp://localhost:2375 without TLS" is turned on
-
Supabase Service Unavailable - Make sure you don't have an "@" character in your Postgres password! If the connection to the kong container is working (the container logs say it is receiving requests from n8n) but n8n says it cannot connect, this is generally the problem from what the community has shared. Other characters might not be allowed too, the @ symbol is just the one I know for sure!
-
SearXNG Restarting: If the SearXNG container keeps restarting, run the command "chmod 755 searxng" within the ai-suite folder so SearXNG has the permissions it needs to create the uwsgi.ini file.
-
Files not Found in Supabase Folder - If you get any errors around files missing in the supabase/ folder like .env, docker/docker-compose.yml, etc. This most likely means you had a "bad" pull of the Supabase GitHub repository when you ran the suite_services.py script. Delete the supabase/ folder within the Local AI Package folder entirely and try again.
GPU Support Issues
-
Windows GPU Support: If you're having trouble running Ollama with GPU support on Windows with Docker Desktop:
- Open Docker Desktop settings
- Ensure 'Enable WSL2 backend' is enabled
- See the Docker GPU documentation for more details
-
Linux GPU Support: If you're having trouble running Ollama with GPU support on Linux, follow the Ollama Docker instructions.
🛍️ More AI templates
For more AI workflow ideas, visit the official n8n AI template gallery. From each workflow, select the Use workflow button to automatically import the workflow into your local n8n instance.
👓 Recommended reading
Useful content for deeper understanding AI concepts.
- AI agents for developers: from theory to practice with n8n
- Tutorial: Build an AI workflow in n8n
- Langchain Concepts in n8n
- Demonstration of key differences between agents and chains
📜 License
This project (originally curated by the n8n team, then Cole Medin, links at the top of the README) is licensed under the Apache License 2.0 - see the LICENSE file for details.